

Error 18
Error 17
Error 16
Error 15
Error 14
Error 13
Error 12
Error 11
Error 10
Error 9
Error 8
Error 7
Error 6
Error 4
Error 3
Error 2
All LED off
Error 18
Error 18
– Voltage of internal battery too low!Step 1
 1.Replace measuring head housing and electronic module.
Necessary parts used in the fault locating procedure:
| Step 1: | Exchange measuring head | ** | Replacing of measuring head |
Error 17
Error 17
– Electronic module defective!Step 1
1.Replace measuring head housing and electronic module.Necessary parts used in the fault locating procedure:
| Step 1: | Exchange measuring head | ** | Replacing of measuring head |
Error 16
Error 16
– Electronic module defective!Step 1
1.Replace measuring head housing and electronic module.Necessary parts used in the fault locating procedure:
| Step 1: | Exchange measuring head | ** | Replacing of measuring head |
Error 15
Error 15
– Optical sensor dirty!Step 1
 1. Open the inspection cover
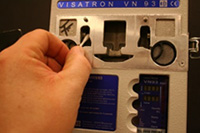 2. clean the infra-red sensor glass on the left side with cotton sticks (P/n.:10036) and technical alcohol (P/n.:10035)
 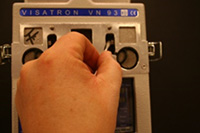 3. clean the infra-red sensor glass on the right side with cotton sticks (P/n.:10036) and technical alcohol (P/n.:10035)
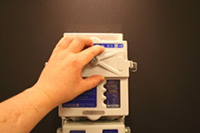 4. close the inspection cover!
Necessary parts used in the fault locating procedure:
| Step 1: | Cotton sticks | 10036 | Checking negative pressure |
| Step 1: | Technical alcohol | 10035 | Checking negative pressure |
Step 2
1.Replace measuring head housing and electronic module.Necessary parts used in the fault locating procedure:
| Step 2: | Exchange measuring head | ** | Replacing of measuring head |
Error 14
Error 14
– Negative pressure/ airflow too low!Step 1
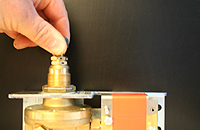 1. Turn off the pressure regulator…
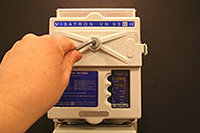 2.remove the plug at the inspection cover…
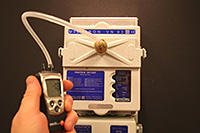 3.install the u- tube manometer…
4. turn up the pressure until it reaches 60 mmH2O..
3.install the u- tube manometer…
4. turn up the pressure until it reaches 60 mmH2O..Step 2
1.Open the inspection cover.. 2.replace the scavenging air filter’s (P/n.:10042) and fresh air restrictor’s (P/n.:10992)… 3.close the inspection cover
Step 3
1.Open the inspection cover.. 2.use the cotton stick (P/n.:10036) and clean the open fresh air bores on the left and right side…3.close the inspection cover
Step 4
1.Remove the measuring head housing.. 2.check the gasket for measuring head (P/n.:10969). If damaged, replace the gasket…
 3.check the flexible bellows (P/n.:10023) If damaged, replace the flexible bellows
 4.check the flexible bellow for fresh air (P/n.:10975) – replace if necessary!
 Step 5
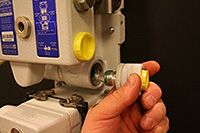 1.Disconnect the ejector input..
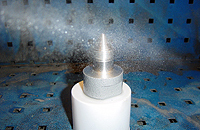 2.clean the unit with clean spray for OMD..3.reinstall the ejector input.
Step 6
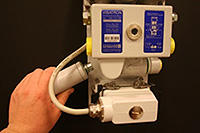 1.Disconnect the ejector output..
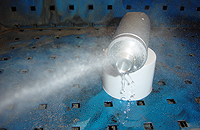 2.clean the unit with clean spray for OMD..3.reinstall the ejector output.
Step 7
1.Replace measuring head housing and electronic module.Necessary parts used in the fault locating procedure:
| Step 1: | Digital u- tube manometer | 100138 | Checking negative pressure |
| Step 1: | Standard u- tube manometer | 10046 | Checking negative pressure |
| Step 2: | Scavenging air filter/ Fresh air filter | 10042 | Replacement of filters |
| Step 2: | Fresh air restrictor | 10992 | Replacement of filters |
| Step 3: | Cotton stick | 10036 | Cleaning of the fresh air bores |
| Step 4: | Gasket for measuring head | 10969 | Replacement of gaskets |
| Step 4: | Flexible bellow | 10023 | Replacement of gaskets |
| Step 5 & 6: | Flexible bellow for fresh air | 10975 | Replacement of gaskets |
| Step 7: | Exchange measuring head | See under ** | Replacing of measuring head |
Error 13
Error 13
– Checksum error!Step 1
1.Open the inspection cover2.clean the infra-red sensor glass on the left side with cotton sticks (P/n.:10036) and technical alcohol (P/n.:10035).3.clean the infra-red sensor glass on the right side with cotton sticks (P/n.:10036) and technical alcohol (P/n.:10035). 4.Replace measuring head housing and electronic module.
Necessary parts used in the fault locating procedure:
| Step 1: | Cotton sticks | 10036 | Checking negative pressure |
| Step 1: | Technical alcohol | 10035 | Checking negative pressure |
If this does not help, do as follows…
Step 2
1.Replace measuring head housing and electronic module.Necessary parts used in the fault locating procedure:
| Step 2: | Exchange measuring head | ** | Replacing of measuring head |
Error 12
Error 12
– Checksum error!Step 1
Repeat parameter setting- see instruction manual!
If this does not help, do as follows…
Step 2
1.Replace measuring head housing and electronic module.Necessary parts used in the fault locating procedure:
| Step 2: | Exchange measuring head | ** | Replacing of measuring head |
Error 11
Error 11
– Ambient temperature too low!Step 1
Engine compartment ventilator blows cold air into the device… change blowing direction of ventilator away from the OMD. Check measuring head heating if this component is defect.
If this does not help, do as follows…
Step 2
1.Replace measuring head housing and electronic module.Necessary parts used in the fault locating procedure:
| Step 2: | Exchange measuring head | ** | Replacing of measuring head |
Error 10
Error 10
– Ambient temperature above 70 C°!Step 1
Remove or turn away ambient heating components. Install metal heat shields against radiation. Install vortex coolers.
If this does not help, do as follows…
Step 2
1.Replace measuring head housing and electronic module.Necessary parts used in the fault locating procedure:
| Step 2: | Exchange measuring head | ** | Replacing of measuring head |
Error 9
Error 9
– Electronic temperature too low!Step 1
Check if engine room ventilator blows air directly at the OMD device… change blowing direction of the ventilator to ensure that cold air is not directed to the OMD device. Check measuring head heating if this component is defect.
If this does not help, do as follows…
Step 2
1.Replace measuring head housing and electronic module.Necessary parts used in the fault locating procedure:
| Step 2: | Exchange measuring head | ** | Replacing of measuring head |
Error 8
Error 8
– Electronic temperature too high!Step 1
Remove or turn away ambient heating components. Install metal heat shields against radiation. Install vortex coolers.
If this does not help, do as follows…
Step 2
1.Replace measuring head housing and electronic module.Necessary parts used in the fault locating procedure:
| Step 2: | Exchange measuring head | ** | Replacing of measuring head |
Error 7
Error 7
– Light button defective!Step 1
 1.- Light button defective!
If this does not help, do as follows…
Step 2
1.Replace measuring head housing and electronic module.Necessary parts used in the fault locating procedure:
| Step 2: | Exchange measuring head | ** | Replacing of measuring head |
Error 6
Error 6
– Supply voltage too high!Step 1
 1.Remove the reset task house…
 2.measure the voltage between pin 1 and 2 to be between 18 and 31,2 Vdc. Re- adjust the voltage if necessary!
 If this does not help, do as follows…
Step 2
1.Replace measuring head housing and electronic module.Necessary parts used in the fault locating procedure:
| Step 2: | Exchange measuring head | ** | Replacing of measuring head |
Error 4
Error 4
– Airflow- sensor defective!Step 1
1.Open the inspection cover2.clean the infra-red sensor glass on the left side with cotton sticks (P/n.:10036) and technical alcohol (P/n.:10035)3.clean the infra-red sensor glass on the right side with cotton sticks (P/n.:10036) and technical alcohol (P/n.:10035)4. close the inspection cover!Necessary parts used in the fault locating procedure:
| Step 1: | Cotton sticks | 10036 | Checking negative pressure |
| Step 1: | Technical alcohol | 10035 | Checking negative pressure |
Step 2
1.Replace measuring head housing and electronic module.Necessary parts used in the fault locating procedure:
| Step 2: | Exchange measuring head | ** | Replacing of measuring head |
Error 3
Error 3
– Airflow- sensor defective!Step 1
1.Replace measuring head housing and electronic module.Necessary parts used in the fault locating procedure:
| Step 1: | Exchange measuring head | ** | Replacing of measuring head |
Error 2
Error 2
– Airflow- sensor defective!Step 1
1.Replace measuring head housing and electronic module.Necessary parts used in the fault locating procedure:
| Step 1: | Exchange measuring head | ** | Replacing of measuring head |
All LED off
All LED are dead/ no light
1. Remove the reset task house…2. the voltage between pin 1 & 2 (18- 26 Vdc)…3. remove the measuring head housing 4. replace the fuse (2A).
Necessary parts used in the fault locating procedure:
| Step 1: | Fuse 3,15 A | 11058 | Replacement of fuse |
If this does not help, do as follows..
1.Replace measuring head housing and electronic module.Necessary parts used in the fault locating procedure:
| Step 2: | Exchange measuring head | ** | Replacing of measuring head |